
The single biggest reason a composite photo reads as fake is light that does not match. A flawless selfie placed into a flawless background still looks wrong if the light on the face does not behave like the light in the room.
This article is about reducing the mismatch at the source — in your selfie — and reinforcing it in your prompt so the model has to do less invention. None of it requires equipment.
What "matching light" actually means
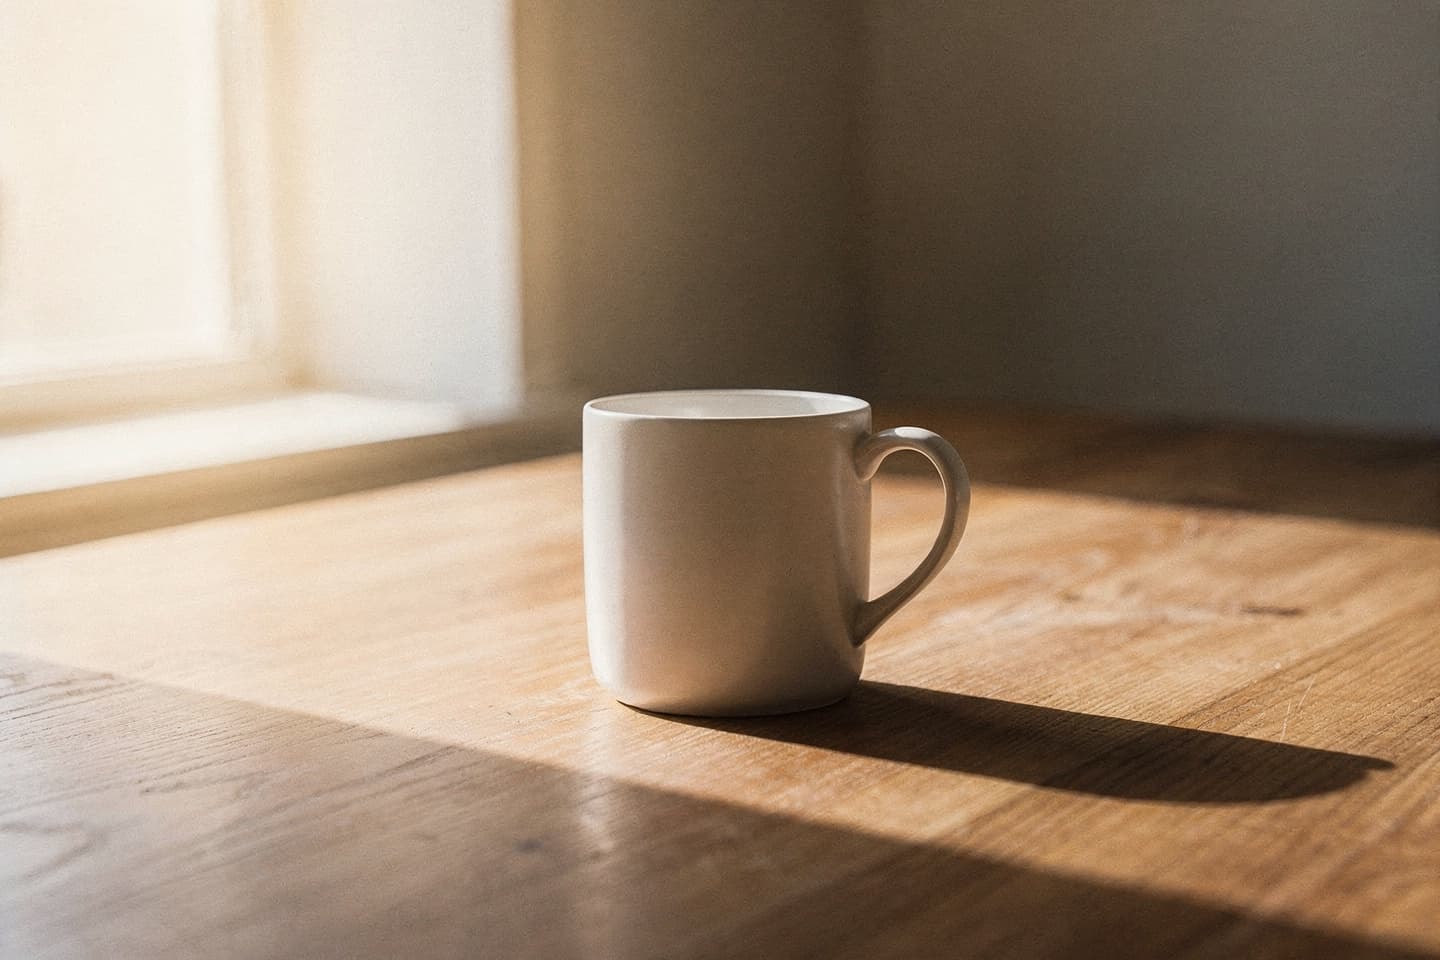
When a real photo is taken, every visible surface shares the same physics. The light has a colour. It has a direction. It has a quality (hard or soft). It bounces off walls and back onto faces. A real cafe selfie taken at 4 p.m. by a window has:
- A warm-cool gradient on the face (warm from the window side, cooler from the room side).
- A subtle catchlight in the eyes shaped like the window.
- A shadow under the chin that points away from the window.
- Skin tones that pick up a tiny amount of whatever the dominant wall colour is.
The model can render all of this in the background of your finished photo. What it cannot do is rewrite the light on your face if your selfie's light points the wrong way. So most of the work happens before you upload.
Four lighting tells that ruin composites
The four most common reasons a finished photo reads as fake all come from the source selfie.
1. Two light sources, two colour temperatures
Standing under a warm overhead lamp next to a cool window will give you a face that is half warm and half cool. Real photographers solve this by overpowering one source. You can solve it by stepping further from one or the other until only one dominates.
The rule: one dominant light source on the face.
2. Hard shadows from a flash or a phone torch
Flash gives you a flat, raccoon-shadowed face with a hard outline behind the head. It is almost impossible to integrate this into a softly lit cafe. Avoid the flash.
3. Up-light from a laptop or phone screen
Sitting in a dark room with a bright laptop or phone in front of you produces a colour-tinted up-light that screams late-night-at-the-computer. A finished photo of you in a hotel lobby with screen-glow on your jawline reads as wrong, instantly.
The rule: shoot your selfie with the brightest light source above eye level, not below.
4. Cast shadow on the wall behind you
If your selfie has a strong cast shadow on the wall behind you, the model has to invent a background that fits the shadow's geometry. This usually fails. Move further away from the wall, or move closer to the light source, until the cast shadow softens.
How to describe light in your prompt
The model takes prompt language about light very literally. A few patterns work well:
Time of day → colour and angle
Time-of-day language sets the colour temperature and angle of the light at the same time.
- Mid-morning → cool, mid-angle, soft.
- Early afternoon → neutral, slightly overhead.
- Late afternoon / golden hour → warm, low-angle, long shadows.
- Evening / blue hour → cool exterior, warm interior contrast.
- Late evening → mostly artificial, mixed temperatures.
Light source → quality and direction
Naming the light source explicitly is more reliable than naming a vague mood.
- Soft natural light from a window on the left → directional, soft, daylight-temperature.
- Warm overhead lamps → diffuse, slightly downward, warm.
- A single tall floor lamp → directional, warm, slightly low.
- Fluorescent ceiling lights → flat, slightly green, hard.
- Candlelight on the table → very warm, low, soft.
Combinations
Two-source combinations make scenes more believable, especially in transitional places like airports, gates, and hotels.
Late afternoon, warm window light from behind me, and the cool overhead light of a hotel corridor.
This kind of language gives the model permission to produce the mixed colour temperatures that look like real architectural photography.
Matching the prompt to the selfie
The strongest move is to take the selfie with the kind of light you plan to put in the prompt.
| Selfie light | Best prompts | |---|---| | Soft window light, daytime | Cafes, hotel lobbies, libraries, home offices, museums | | Warm overhead lamp, evening | Restaurants, bars, hotel lobbies at night, late offices | | Bright outdoor daylight | Streets, parks, terraces, viewpoints, beach paths | | Mixed indoor light | Airports, train stations, conference venues |
If your selfie was taken under bright outdoor daylight and your prompt is a candlelit restaurant, the model has to do something heroic with your face. It usually does not. Re-take the selfie or change the prompt.
A two-step source check
Before you upload, look at your selfie and answer two questions.
- Which direction is the dominant light coming from? Note it (e.g., left and slightly above).
- Is the colour of that light warm, neutral, or cool? Note it (e.g., warm).
Then write your prompt so the dominant light in the scene matches both. Late afternoon window light from the left matches a left-and-warm selfie. Cool fluorescent overhead matches a neutral-and-flat selfie. Mismatched answers are the largest single source of finished-photo failure.
Edge cases
A few specific situations come up often.
- Sunglasses outdoors: prompt has to include direct sunlight. Otherwise the glasses look like a costume.
- Hat or hood: the model treats hats as part of the wardrobe. They will appear in the finished photo. If the prompt is indoor and warm, write holding the hat or remove the hat for the selfie.
- Coloured walls in selfie background: a strongly coloured wall behind you can bleed colour onto your face. If you intend a neutral-walled setting in the prompt, take the selfie against a neutral wall too.
Related reading
Try it yourself
Once your selfie and prompt agree about the light, the rest of the pipeline is straightforward. Try it free at btdt.fun — three credits, no card on file.